
Channel your inner Christina Tosi, even if you don’t have the multiple years of baking experience. These 8 showstopping cookie art ideas are too sweet to pass up, even if you are a rookie. Scroll down for the recipe and materials needed to recreate these cookies!
“Eat Me” Cookies
You’ll definitely get your message across with these cookies.


Other materials needed:
- parchment paper
- piping bag
- black icing
- design of your choice
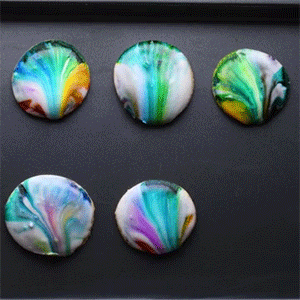
Galaxy Cookies
No two galaxies were created equal. Have fun splatter painting!
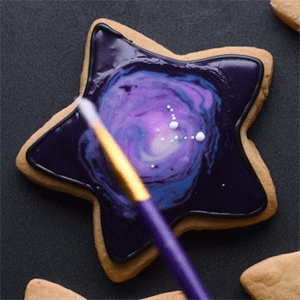
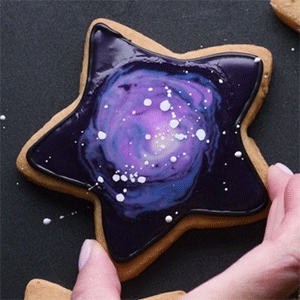
Other materials needed:
- paint brush
- measuring cup (1/3 or 1/2 cup should work best)
Paintable Cookies
Your kiddos will love adding their own creativity to these crafty cookies. Just pipe any design and let them color the rest!

Other materials needed:
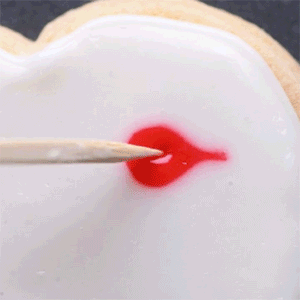
Watercolor Cookies
Let physics take over and be the artists with these watercolor cookies.

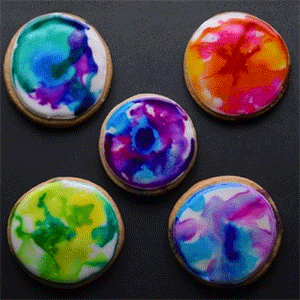
Other materials needed:
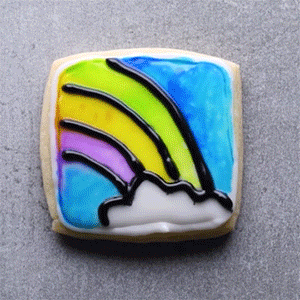
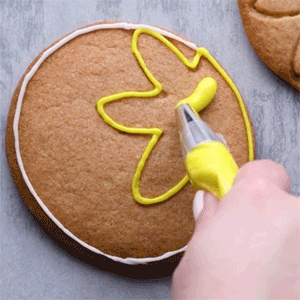
Flower Cookies
This hack is for all you who like to color within the lines. Take any shaped cookie cutter and make a soft imprint in your cookie dough before you bake!

Other materials needed:
Lipalicious Valentine’s Day Cookies
Valentine’s Day is just around the corner. Get crafty and creative this year with these lipalicious, heart-shaped Valentine’s Day cookies.

Other materials needed:
Geode Cookies
These cookies are the perfect gift for your favorite geologist with a sweet tooth.


Other materials needed:
- white rock candy crystals
- eye dropper
- melted chocolate of your choice
- paint brush
- edible gold paint
Jackson Pollock Cookies
Channel your inner Jackson Pollock with these dippable cookies.

Other materials needed:
Recipe
Prep time: 20 minutes
Complexity: Intermediate
Servings: 6 cookies per batch
Ingredients:
For the sugar cookie dough:
- 1 egg
- 3 ½ cup all-purpose flour
- 1 ½ tsp baking powder
- 1 tsp salt
- 1 ¼ cup sugar
- ¼ cup butter
- 1 tsp vanilla extract
For the icing:
Directions:
- Mix together flour, baking powder, salt, and sugar.
- Add an egg, vanilla extract, and softened butter.
- Mix well and roll it out with a rolling pin until you reach the desired thickness.
- Cut with cookie cutters and place on the baking sheet.
- Bake at 350*F for 10 minutes.
- Make the icing by mixing powdered sugar, meringue powder, and warm milk.
- Whisk the mixture until combined.
- Add food coloring.
- Fill the piping bag with icing and pipe the cookies following the piping instructions. Use a skewer to help spread icing to all edges of the cookie.