
Who doesn’t love mashed potatoes? They are always my favorite part of any holiday dinner. The inevitable question I hound my aunts with is “will there be mashed potatoes?” It’s been the same routine for the last 20-something years; I’m almost 23 and I’m still licking the mashed potato spoon. The running joke in my family is that no one is allowed to get the first scoop of whipped goodness before me (the same goes for green beans).
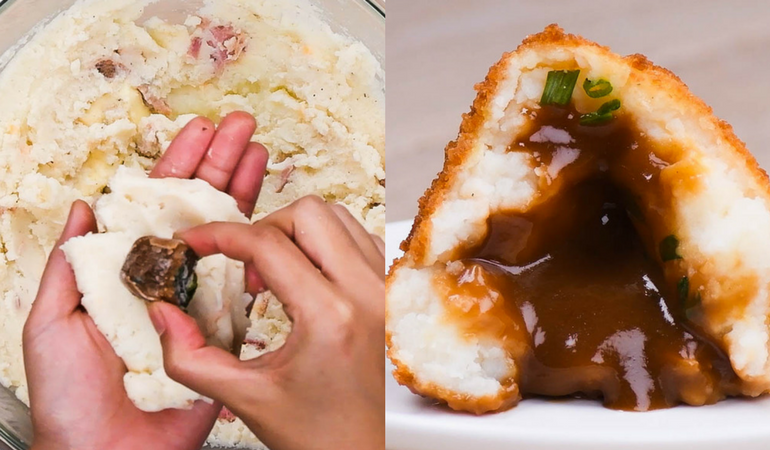
Alright, but have y’all ever heard of mashed potato GRAVY BOMBS? Now, I’ve had my fair share of potato balls in the past, but I always felt like something was missing… THE GRAVY. Not only are these mashed potatoes handheld, but they also ooze gravy with every bite! I don’t know about you guys, but that sounds like the dream right there.
These mashed potato gravy bombs make for the perfect 2-in-1 side dish (you can even make them your entree!). Also, there’s no more giving that one relative who over-serves themselves the side-eye when it’s your turn at the mashed potato bowl and you’re already scraping the bottom. You just grab them and go, and you can make them as big or as small as you like. You’ll definitely be catching me back in line for seconds.


Shutterstock
*Recipe courtesy of the So Yummy team*
Ingredients:
Gravy Instructions:
Photo by So Yummy
Hack time! A regular ice cube tray will work just fine for this. If you have a tray with fun shapes, feel free to get a little more creative and use that, too! Who wouldn’t want Avengers-shaped gravy cubes in their mashed potatoes?
Add whichever flavored gravy you would like to a large measuring cup. 2 cups of it will be enough to fill the tray. In each well, pour enough gravy until you reach the top line. Repeat until the entire tray is filled.
Photo by So Yummy
Chop up a handful of fresh parsley and sprinkle it over your gravy tray (a “gravy tray” sounds like heaven to me, tbh). Put the tray in the freezer and allow it to freeze until the gravy is solid. This should take about 1 hour.
Mashed Potatoes Instructions:
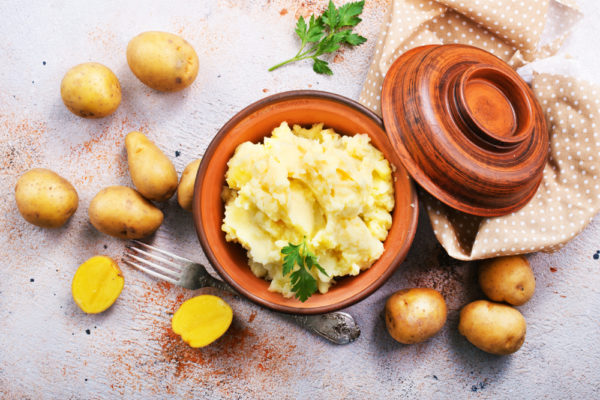
Whip up your mashed potatoes however you like. Personal tip: I prefer to use Yukon Gold potatoes and let them boil with the skin on. While I’m letting the potatoes cool I’ll add some chopped garlic and a scoop of butter in the same pot. I’ll let that melt and then add the boiled potatoes. I prefer my mashed potatoes to be pretty creamy, so I’ll add about ¼ cup of milk to the pot before I begin mashing and continue to add any more I might need until I reach my desired consistency.
Photo by So Yummy
While those potatoes are boiling, start working on all the fixings you’ll be adding to them. Fry up 3 strips of bacon and chop them down to fairly good-sized chunks. It all depends on preference here. If you want tiny bits of bacon, GREAT. If you want large chunks of bacon, SUPER.
Photo by So Yummy
Once your mashed potatoes are complete, add them to a large mixing bowl. Follow with adding your 3 strips of chopped bacon, 3 Tbsp of salt, 3 Tbsp of pepper, 2 pats of butter, and ½ cup of grated cheese.
Photo by So Yummy
Stir this deliciousness up!
Photo by So Yummy
Once your hour is up, remove the ice tray full of gravy from the freezer. Flip the tray over and this is what your “gravy cubes” should look like.
Photo by So Yummy
Grab a handful of your mashed potatoes (be generous with the amount) and add one frozen gravy cube in the center.
Photo by So Yummy
Roll and knead the mashed potatoes in your hands until the gravy cube is completely encased. They don’t have to be perfectly spherical. Repeat this step until either you run out of gravy cubes or mashed potatoes.
Photo by So Yummy
Take each mashed potato ball and roll it around in a bowl of flour. Make sure you coat it thoroughly. Repeat with each mashed potato ball.
Photo by So Yummy
Whisk your 3 eggs in a medium-sized bowl. Add your flour-coated mashed potato balls and give them a little egg bath. Again, repeat with each mashed potato ball.
Photo by So Yummy
The final step before we begin frying is to coat each mashed potato ball in a thin layer of breadcrumbs.
Photo by So Yummy
It’s fry time! Carefully add each coated mashed potato ball to a pot full of vegetable oil. Fry them at 350°F until they are golden brown.
Photo by So Yummy
Remove your fried mashed potato balls from the frier using a wired skimmer.
Photo by So Yummy
Plate up your mashed potato gravy bombs and garnish with more fresh parsley and you’re ready to dig in! Check out the video below as a visual guide to follow along with as you make these! Be sure to tag us in your creations!
Making dessert dumplings can be a delightful kitchen activity, especially when you have the right…
Baking is fun, but it can also be messy and time-consuming. Luckily, there are these…
Want to make your cakes look amazing? Check out these awesome tools that will help…
Baking is both an art and a science, but a few clever hacks can make…
Nothing beats an ice-cold drink on a hot day--whether it's a perfectly crushed slushie or…
Who knew whisks come in many shapes and sizes? These amazing creations are every baker's…
This website uses cookies.