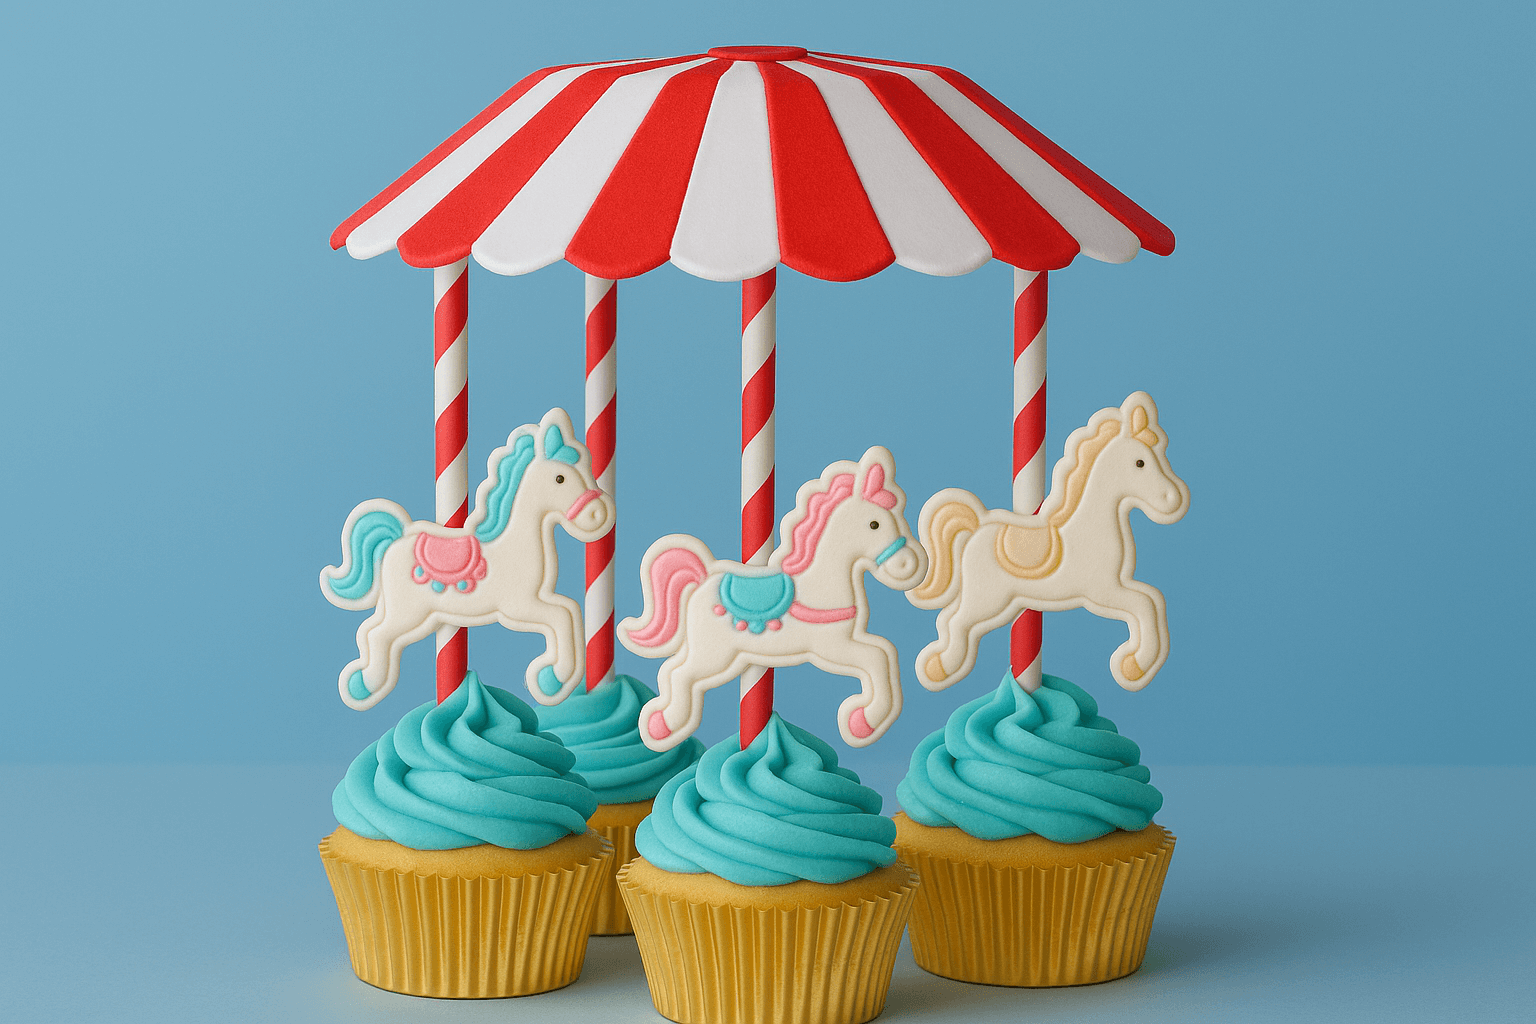
Got a love for fun carousel rides? Bring that playful magic into your kitchen with these whimsical carousel cupcakes! Perfect for birthdays, baby showers, or any celebration that needs a show-stopping treat, these cupcakes are as fun to make as they are to display.
In this step-by-step guide, you’ll learn how to bake, decorate, and assemble your carousel cupcake centerpiece. Plus, we’ll share the must-have tools to make it all come together with ease. Let’s get baking! 🤩
🎠 Recipe + DIY Assembly:
1. 🧁 Vanilla Cupcake Base (12 cupcakes)
Ingredients:
-
1 ½ cups all-purpose flour
-
1 ½ tsp baking powder
-
¼ tsp salt
-
½ cup unsalted butter, softened
-
¾ cup granulated sugar
-
2 large eggs
-
2 tsp vanilla extract
-
½ cup whole milk
Instructions:
-
Preheat oven to 350°F (175°C) and line your non-stick muffin tin with gold foil cupcake liners.
-
In a medium bowl, whisk together flour, baking powder, and salt.
-
In a large bowl, cream butter and sugar until light and fluffy (about 3 minutes).
-
Beat in eggs, one at a time, then add vanilla.
-
Gradually add dry ingredients, alternating with milk. Mix until smooth.
-
Divide batter evenly and bake for 18–20 minutes or until a toothpick comes out clean.
-
Cool completely before frosting.
2. 🍭 Turquoise Vanilla Buttercream
Ingredients:
-
1 cup unsalted butter, softened
-
3 cups powdered sugar
-
2–3 tbsp heavy cream or milk
-
1 ½ tsp vanilla extract
-
Blue gel food coloring (a tiny bit goes a long way, especially if it’s highly concentrated)
Instructions:
-
Beat butter until creamy (about 2 minutes).
-
Gradually add powdered sugar, 1 cup at a time.
-
Add vanilla and cream, beat on high until fluffy.
-
Mix in blue food coloring until you get a vibrant turquoise.
Pipe tall swirls on each cupcake using a large star piping tip (e.g., Wilton 1M).
3. 🎠 Edible Fondant Carousel Horse Toppers
🛒 What You’ll Need:
-
White fondant (or gum paste for a firmer finish)
-
Gel food coloring (pastels work well—pink, blue, gold, etc.)
-
Cornstarch (to prevent sticking)
-
Small rolling pin
-
Horse cookie-cutter (carousel-style)
-
Edible gold paint or edible markers
-
Lollipop sticks or paper straws (for the carousel poles)
-
Optional: Tylose powder (to help fondant firm up faster)
🧁 How to Make the Fondant Horses:
Step 1: Prep the Fondant
-
Knead your white fondant until smooth. If using Tylose, knead in a pinch to help the horse harden faster.
-
Lightly dust your surface with cornstarch.
Step 2: Roll and Cut
-
Roll fondant to about ⅛ inch thick.
-
Use the horse cookie cutter to cut out carousel-style horse shapes. If you don’t have a cutter, you can print a silhouette and trace it with a small blade.
-
Gently press a lollipop stick or straw into the back of each horse for support. Be careful not to distort the shape.
Step 3: Decorate the Details
-
Color small batches of fondant in pastel pink, blue, or gold.
-
Roll and cut tiny saddles, manes, tails, or reins to decorate your horses.
-
Attach fondant details using a small dab of water or edible glue.
Step 4: Paint & Accents
-
Add extra flair with edible gold paint or metallic edible markers—outline the saddle, add swirls, or paint the hooves.
-
Let the horses dry flat on parchment or dry wax paper for 8–12 hours, or until they feel firm and hold their shape upright.
4. 🎪 Carousel Top & Decorations + Assembly Guide
🛠️ What You’ll Need:
-
Fondant carousel horses (pre-made and dried; see previous steps)
-
Red-and-white striped paper straws (for a perfect carousel look)
-
Small dot of royal icing or melted white chocolate (for glue)
-
Canopy topper (made of cardstock, fondant, or foam core)
-
Toothpicks, skewers, or hot glue (to secure straws to the canopy)
-
Optional: edible glue or double-sided tape for lighter horses
🧁 Step-by-Step Assembly
Step 1: Prep the Horses and Straws
-
Make sure your fondant horses are dry and firm (8–12 hours drying time is ideal).
-
Cut the paper straws to the desired height—usually 4–6 inches, depending on the size of your cupcakes and canopy.
-
Optional: Flatten one side of each straw slightly (where the horse will attach) to give better contact.
Step 2: Attach the Horse to the Straw
-
Apply a small dab of royal icing, edible glue, or melted white chocolate to the back/center of the horse.
-
Gently press the horse onto the straw where it will sit upright, about 1–2 inches from the bottom.
-
Hold in place for a few seconds until secure. Lay flat to dry fully—about 30 minutes to 1 hour.
💡 Tip: For heavier horses, you can use a toothpick behind the horse as a brace, or gently press the horse onto a toothpick before attaching to the straw.
Step 3: Anchor Straws into the Cupcakes
-
Frost cupcakes with tall buttercream swirls so the straws can stand firmly.
-
Gently insert the straws (with horses attached) into the center or edge of each cupcake.
-
Make sure they are evenly spaced in a circle if you’re placing a canopy above.
Step 4: Attach the Straws to the Canopy
-
Use a lightweight canopy (made of cardstock or fondant over cardboard). Poke or pre-drill holes where each straw will go.
-
Insert the tops of the straws into the canopy holes.
-
For cardstock: Secure with glue or tape on the underside.
-
For fondant/foam core canopy: Insert straws into soft fondant or glue in place.
-
-
Let everything set upright for 10–15 minutes to stabilize.
5. 🎪 Final Touches
-
Add edible glitter or stars around the cupcake base for extra magic.
-
Use matching colors between the horses, canopy, and frosting for a cohesive theme.
Now that we’ve got the recipe, let’s take a look at the essential tools that make creating carousel cupcakes easier and more fun. These budget-friendly picks are not only affordable but also super versatile—you’ll find yourself reaching for them again and again in future baking projects!
Red and White Striped Paper Straws

Make your carousel cupcake come alive with these red striped paper straws as carousel poles! They’re durable, eco-friendly, and hold up well in drinks without falling apart. They come in a pack of 100, making them a great value for your money. Also perfect for cocktails, milkshakes, and more!
Dry Waxed Paper

These wax paper sheets are made from high-quality, food-safe materials that help keep your treats fresh and mess-free. They’re perfect for lining surfaces while you work on your carousel cupcakes—whether you’re shaping fondant horses, piping frosting, or setting decorated toppers aside to dry.
So Yummy by bella Muffin Pan

The So Yummy by bella Baker’s Dozen Muffin Pan is a clever and practical tool for any baker. With 13 cups, you get an extra muffin for taste-testing or just for fun. The nonstick coating ensures your cupcakes for the carousel come out easily, and the pan is easy to clean. Made from durable aluminum, it provides even baking every time!
Food-Safe Decorating Brush Set

Add details and flair to your carousel cupcakes with these decorating brushes! With five different brush tips, you can create intricate designs and add edible glitter with ease. Easy to clean and durable, they’re perfect for home bakers and pro alike!
Food Coloring

Add a burst of color to your carousel cupcakes with this vibrant food coloring set. The highly concentrated formula means a little goes a long way—perfect for tinting fondant horses, buttercream frosting, or decorative accents with rich, eye-catching shades. It’s both economical and effective for all your baking projects.
