7 Genius Cleaning Hacks for Greasy Kitchen Cabinets That Actually Work! (2026)
What if your kitchen’s biggest “ick” became its most satisfying “glow-up” moment? We’ve all felt that heart-sinking moment when you reach for a snack and your fingers stick to the door. Ugh! Don’t let that gummy, stubborn residue kill your vibe or your budget. You absolutely don’t need expensive, harsh chemicals that smell like a lab to get a professional result. In fact, the most effective cleaning hacks for greasy kitchen cabinets are likely sitting in your pantry right now!
We totally get it; you want a space that feels fresh, clean, and totally Instagram-ready without the fear of stripping your beautiful wood finish. It’s time to ditch the stress and embrace the sparkle! We promise to help you transform your sticky, dull kitchen into a sparkling, fresh sanctuary with these foolproof, fun, and fast-acting pantry hacks. Get ready to discover seven genius ways to use everyday ingredients like vinegar, baking soda, and dish soap to achieve a squeaky-clean finish that smells incredible. Let’s make your kitchen shine!
Key Takeaways
- Unlock the mystery of “polymerized grease” to finally understand why that sticky film won’t budge—and how to beat it!
- Grab your blue dish soap and baking soda for the ultimate cleaning hacks for greasy kitchen cabinets that deliver a squeaky-clean, fresh finish.
- Experiment with wacky but effective tricks like “Flour Power” and vegetable oil to melt away splatters like magic.
- Protect your investment by learning the vital differences between wood, veneer, and laminate before you start your creative cleaning session.
- Transform your daily routine with a fast-paced “micro-habit” that keeps your kitchen feeling like a fresh, vibrant, and joyful sanctuary.
The Science of Sticky: Why Do Kitchen Cabinets Get So Greasy?
Ever wonder why your cabinets feel like they’re covered in invisible glue? Say hello to the “Grease-Dust Duo”! This tacky, stubborn, annoying film is actually a chemical reaction happening right in your kitchen. When you sizzle, sauté, or fry, tiny droplets of oil go airborne. They float, they land, and they invite every speck of dust to a sticky party on your beautiful surfaces. It’s a magnet for mess!
This gets even wilder. Heat from your stove actually “bakes” these splatters through a process called polymerization. This turns liquid oil into a hard, plastic-like coating that feels impossible to move. It’s essentially like your cabinets are growing a layer of shrink-wrap you never asked for! Standard sprays often fail because they can’t penetrate this tough, cured layer. But don’t worry; we’re about to dive into the best cleaning hacks for greasy kitchen cabinets that melt this mess away like magic!
The Culinary Culprits: Heat, Steam, and Oil
Think about your last delicious stir-fry. High heat and steam send microscopic oils traveling from the pan straight to the ceiling. Your cabinets near the stove suffer the most grease-trauma because they’re right in the “splash zone” of every meal. Waiting for a massive spring cleaning makes the job 10x harder. When grease sits, it cures and hardens into that legendary “ick” factor. Treat your kitchen to a quick reset instead of a marathon chore session!
Why Your Current Cleaner Isn’t Cutting It
Most all-purpose sprays are designed for light surface dust. They literally slide right off the grime! To really win this battle, you need to understand The Science of Cleaning Agents. Kitchen oils are naturally acidic, which means you need the perfect pH balance to break their grip. A simple surface wipe isn’t the same as a deep degreasing session. You need a solution that actually eats through that “plastic” layer without hurting your finish. Get excited, because our next section reveals the pantry-based power duos that make these cleaning hacks for greasy kitchen cabinets totally foolproof!
Imagine running your hand across your cabinet and feeling only smooth, clean, cool surfaces. No stick. No tack. Just pure, sparkling joy! A fresh-smelling, non-sticky cooking environment changes your whole mood. It turns your kitchen into a creative, whimsical escape where you can focus on the fun of food. Let’s get that “So Yummy” glow back today!
The 2-Ingredient Power Duo: Banish Grease with Pantry Staples
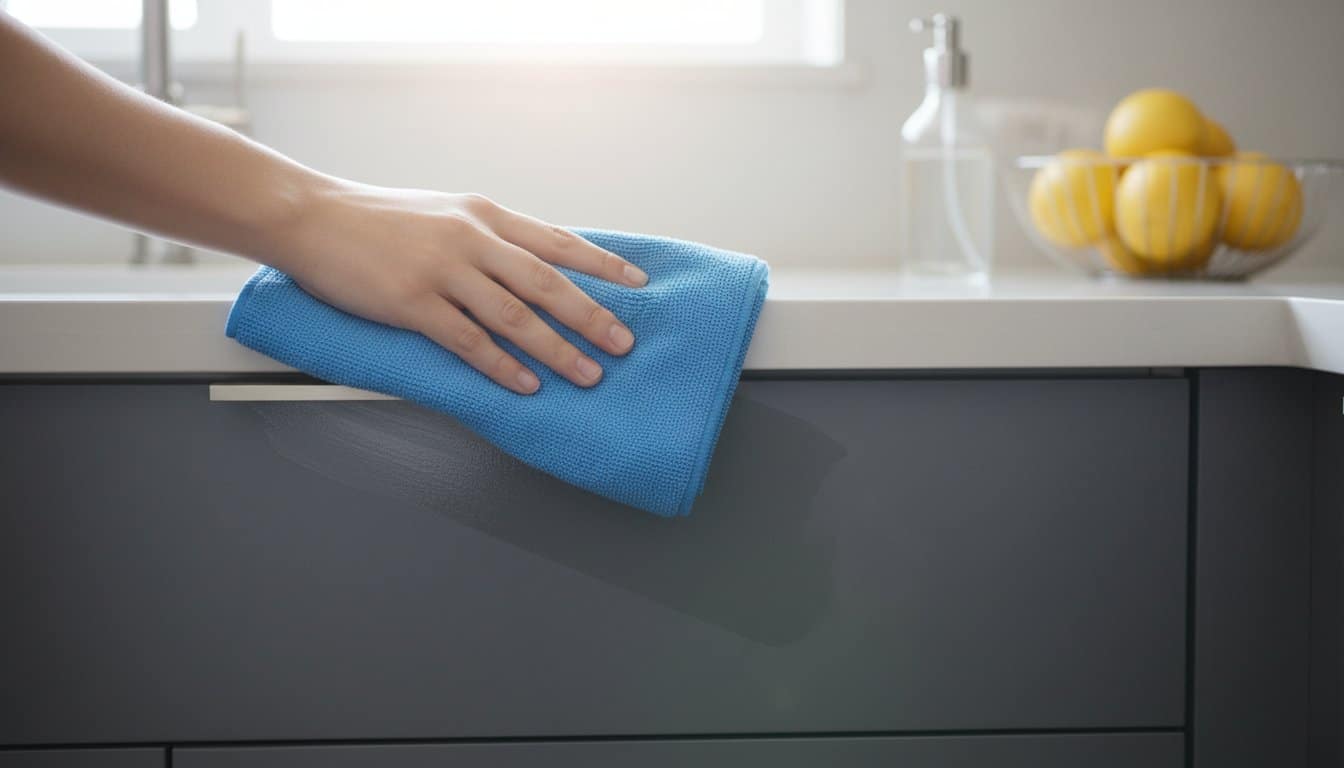
Ready for a total game-changer? Forget the scary chemical aisle! Your pantry is hiding a “Dynamic Duo” that makes cleaning hacks for greasy kitchen cabinets feel like a fun, satisfying science experiment. We’re talking about the dream team: blue dish soap and baking soda. This is the ultimate “So Yummy” promise. You can achieve foolproof, professional, and sparkling results using simple things you already have in your cupboard! It’s fast, cheap, and incredibly effective.
Why does this combo work so well? It’s a double threat for your kitchen! The blue dish soap acts as a powerful chemical degreaser that breaks down oils on contact. Meanwhile, the baking soda provides a gentle, safe, and effective physical exfoliation. It lifts that “plastic” polymerized grease we talked about earlier without scratching your beautiful finish. It’s a creative way to scrub away the “ick” and reveal the “wow” in minutes! Once your surfaces are glowing, you’ll be inspired to whip up some fresh Cooking Recipes in your brand-new sanctuary.
The Baking Soda & Dish Soap Scrub
Let’s mix it up! To create your magic cleaning paste, mix 1 part blue dish soap to 2 parts baking soda. You want a thick, non-drip, whipped consistency that clings perfectly to those vertical cabinet doors. Apply the paste with a soft sponge using circular, rhythmic, joyful motions. Watch as the grime simply vanishes! Saponification is the fascinating chemical process where the soap molecules grab onto oil and pull it away from the surface. For more expert advice on maintaining a healthy home, look at Michigan State University Extension’s cleaning recommendations. They emphasize how a regular routine keeps your space safe and stunning!
Vinegar & Citrus: The Natural Degreaser
Looking for a lighter touch? Vinegar is your best friend! The acetic acid in white vinegar slices right through light grease veils like a hot knife through butter. For a fresh, zingy, sensory kitchen experience, toss some lemon rinds into your vinegar spray. It smells incredible! It’s bright, clean, and totally refreshing. Use this liquid spray for your weekly “swoosh” and save the heavy-duty paste for those stubborn, built-up spots. This “So Yummy” style reset ensures your kitchen always feels like a vibrant place to play. Grab your spray bottle and let’s get started!

5 Creative Cleaning Hacks You Have Never Tried Before
Ready to turn your kitchen into a playground of “So Yummy” magic? Forget those boring, industrial chemical solutions often found on random forums. We’re diving into some wacky, wonderful, and wildly effective cleaning hacks for greasy kitchen cabinets that you won’t believe actually work! These are the creative experiments that turn a dull afternoon into a total home reset. Grab your supplies and let’s get started!
First up is the legendary “Flour Power” hack. Did you just finish frying up one of our favorite Cooking Recipes and end up with a fresh splatter? Don’t reach for the spray! Sprinkle some all-purpose flour directly onto the wet grease. The flour acts like a tiny sponge, soaking up the oil before it has a chance to harden. In seconds, you can just brush away the crumbs. It’s fast, mess-free, and incredibly fun to watch!
The Unexpected “Oil vs. Oil” Method
This sounds totally counterintuitive, right? Rubbing oil on a greasy cabinet? Trust the process! The “like dissolves like” principle is a real cleaning miracle. Apply a tiny amount of fresh vegetable oil to a cloth and rub it over old, crusty grease spots. The fresh oil actually loosens the chemical bond of the hardened gunk. This method is perfect for wood cabinets that look thirsty, dull, and tired. Follow up with a quick soap wipe for a squeaky-clean, conditioned finish that glows with health.
Steam Cleaning Without a Machine
You don’t need a bulky, expensive steamer to melt away polymerized gunk effortlessly. You can create a “grease-melter” right in your microwave! Dampen a cloth with water and heat it for about 30 to 45 seconds. Safety first: the cloth will be very hot, so always use tongs to remove it from the microwave. Press the steaming towel against the stubborn buildup for a few seconds to soften it. You’ll be able to wipe away years of residue in one satisfying, smooth motion!
For the ultimate “So Yummy” result, don’t forget the tiny details. Use the toothbrush detail trick! A standard sponge can’t reach into those intricate, decorative grooves where grease loves to hide. A soft toothbrush gets into every corner with ease. Finally, finish with the microfiber buff. A dry microfiber cloth is the secret to a high-gloss, streak-free shine that makes your kitchen feel brand new. It’s the perfect final touch for your sparkling sanctuary!
Material Matters: How to Clean Every Cabinet Finish Safely
One size fits all? No way! That’s a total recipe for a cabinet disaster. Every kitchen has its own unique personality, material, and finish. Using the wrong cleaning hacks for greasy kitchen cabinets can turn a fun afternoon reset into a total nightmare. While we love our pantry magic, different surfaces need different levels of love! Before you dive into your creative cleaning session, you must follow the Golden Rule: always test a tiny, hidden spot first! It’s the absolute best way to ensure your DIY experiments stay safe, stunning, and successful.
Not sure what you’re working with? Take a quick look! Real wood shows off natural, unique grain patterns. Veneer is a thin, beautiful layer of wood over a sturdy core. Laminate feels more like a smooth, uniform, and plastic-like shield. Identifying your material is the first step toward that “So Yummy” glow-up. Once you know your surface, you can pick the perfect tool for the job. You wouldn’t use a heavy-duty scrub on a delicate painting, right? The same logic applies to your home sanctuary!
Caring for Classic Wood & Painted Finishes
Listen up, wood lovers! Excessive water is the ultimate enemy of beautiful wood grain. It can cause swelling, warping, and heartbreak. To keep things safe, use the “Dry Wipe” technique. Always follow your damp cleaning cloth immediately with a soft, dry towel. This prevents moisture from sitting and keeps your paint from softening or peeling. For that deep, rich, and nourished glow, try a specialized oil soap. It cleans while it conditions, leaving your cabinets looking healthy and vibrant. It’s the perfect way to prep your space before you start testing out new Cooking Recipes for the family!
Sparkling Solutions for Laminate and High-Gloss
Modern kitchens often feature flat-front cabinets that look sleek, chic, and contemporary. But those high-gloss surfaces can be total magnets for streak-marks! Microfiber is the only tool you really need here for a mirror-like finish. It lifts oils without leaving behind any fuzzy residue. Are you dealing with the trendy but tricky matte black cabinetry? Fingerprints are the main villain there! A tiny drop of blue dish soap on a damp microfiber cloth, followed by a quick dry buff, will make those smudges vanish like magic. It’s fast, simple, and incredibly satisfying to see that flat finish return to its original, velvety perfection. Let’s get that high-energy shine back into your cooking space!
The So Yummy Kitchen Reset: Pro Tips for a Forever-Clean Space
You’ve done it! Your kitchen is glowing, fresh, and totally fabulous. But how do you keep that So Yummy sparkle alive without spending every single weekend scrubbing? It’s all about the micro-habit! Transform your routine into a series of small, joyful wins that keep the grime away for good. Instead of waiting for a massive deep clean, embrace the 30-second post-cooking “Swoosh.” This simple ritual ensures your space stays squeaky-clean, fresh, and inviting every single day. It’s fast. It’s easy. It’s effective!
A quick, rhythmic wipe with a damp cloth after you’ve finished your favorite Cooking Recipes prevents that sticky film from ever taking hold. When you treat your kitchen to this immediate love, you stop the “Grease-Dust Duo” before they even have a chance to meet. It turns maintenance into a creative, whimsical, and rewarding part of your culinary journey. By staying ahead of the mess, you’ll find that you need those heavy-duty cleaning hacks for greasy kitchen cabinets much less often. Let’s keep that vibrant energy flowing!
The Splatter-Proof Cooking Routine
Prevention is the ultimate creative hack for a happy home! Use lids and splatter guards as your first line of defense against airborne oils. These simple tools catch the mess before it travels to your ceiling or cabinets. Did you know that turning on your exhaust fan just 2 minutes before you start sizzling can make a huge difference? It creates a steady, strong, and reliable airflow that pulls grease droplets away from your surfaces. Practice the “Clean as You Go” mantra to keep your workspace clear. It turns your culinary life into a stress-free, breezy, and beautiful experience!
Upgrade Your Kitchen Game
Believe it or not, your tools impact your cleaning life! High-quality cookware leads to less smoke and less grease splattering across your room. When your pans distribute heat evenly, you get better sears and fewer messy explosions. Check out the So Yummy cookware line for easy-clean tech that makes your life a total dream. These pieces are designed to be as functional as they are gorgeous! High-quality materials mean less sticking and easier resets after every meal.
Now that your kitchen is a sparkling, vibrant, and happy sanctuary, it’s time to celebrate! We want to see your amazing results. Snap a photo and share your “Before & After” on social media to inspire your friends. There is nothing quite like the feeling of a fresh-smelling, non-sticky kitchen to spark your next big creative idea. Keep experimenting, keep playing, and keep your space So Yummy!
Unlock Your Kitchen’s Glow Today!
Your journey from sticky to stunning is officially complete! You’ve mastered the science of polymerized grease and discovered why simple pantry staples like baking soda and dish soap are the ultimate dream team. By matching the right cleaning hacks for greasy kitchen cabinets to your specific wood or laminate finish, you’ve ensured a safe, sparkling, and sensational result every time. No more gummy residue or dull surfaces; just pure, high-gloss joy!
Millions of creative followers trust our foolproof kitchen hacks because they’re tested by pros and designed for real life. It’s no wonder our tips and tools are featured in major retailers! Now that your sanctuary is fresh, fabulous, and totally inviting, why not put those clean surfaces to good use? Ready to cook something amazing in your clean kitchen? Explore our latest recipes!
Go ahead and run your hand over those smooth, squeaky-clean doors. It feels incredible, doesn’t it? Keep that vibrant energy moving and turn your next meal into a whimsical, delicious masterpiece. Your kitchen is finally ready for its close-up!
Frequently Asked Questions
Is it safe to use vinegar on my wooden kitchen cabinets?
Yes, but keep it chill! Dilute one part white vinegar with one part warm water to protect that beautiful, natural finish. Acetic acid is a natural, zingy, and effective degreaser, but it can be strong. Never let it sit too long on the surface. Wipe it on, wipe it off, and enjoy that fresh, clean scent that makes your kitchen feel like a sanctuary!
How do I get old, sticky grease off my cabinets without scrubbing?
Try the magic of steam! Use a microwave-heated damp cloth to soften that stubborn, tacky, and annoying gunk in seconds. Once the heat melts the bond, you can simply wipe it away with a soft microfiber cloth. It is one of our favorite cleaning hacks for greasy kitchen cabinets because it saves your muscles and your time while delivering instant gratification!
Can I use a Magic Eraser on painted kitchen cabinets?
Proceed with caution! Magic Erasers are actually tiny, abrasive, and powerful sanding blocks. They might strip the glossy sheen or color right off your painted surfaces, leaving a dull spot. Stick to our “Dynamic Duo” of blue dish soap and baking soda for a safer, gentler, and more joyful glow-up that keeps your custom paint looking brand new and vibrant!
What is the best homemade degreaser for heavy kitchen grease?
The ultimate crown goes to the blue dish soap and baking soda paste! This combo is thick, powerful, and foolproof for tackling the heaviest buildup near your stove. It provides both chemical degreasing and a tiny bit of physical exfoliation. It is the perfect, pantry-based way to turn a “gross” surface into something gorgeous and “So Yummy” in just a few minutes!
Why do my cabinets still feel sticky after I clean them?
You might have some leftover soap residue or stubborn, cured grease still hanging on! If you don’t rinse thoroughly with a clean, damp cloth, the soap itself can feel tacky once it dries. Or, that polymerized “plastic” layer we talked about earlier might need a second round with the hot towel steam to fully break free. Give it one more quick, satisfying swoosh!
How often should I deep clean my kitchen cabinets to prevent buildup?
Aim for a quick, 30-second “swoosh” once a week after you have finished your favorite cooking recipes! This micro-habit stops grease from ever turning into that hard, plastic-like film. For a total kitchen reset, give them a deep, satisfying, and creative clean every three to six months. It keeps your space feeling fresh, vibrant, and always ready for a social media close-up!
Does Dawn dish soap really work on polymerized oil?
It absolutely does! Blue dish soap is a superstar surfactant that loves to grab onto oil molecules and pull them away from the surface. While it is great for fresh splatters, pairing it with the heat of a warm cloth makes it even more effective on that tough, cured gunk. It is a reliable, cheap, and effective staple for any cleaning hacks for greasy kitchen cabinets!
Can I use baking soda on high-gloss or laminate cabinets?
Yes, but keep it gentle! While baking soda is a soft mineral, you should always mix it into a very wet, smooth, and liquidy paste for high-gloss surfaces. Don’t scrub with heavy pressure; let the chemistry do the work instead. Finish with a dry microfiber buff to ensure a streak-free, mirror-like, and stunning shine that looks totally professional and feels incredibly smooth!
